Tesla
Components
The Tesla generator consists of multiple parts that need to be arranged into various setups prior to activation. These parts can be found in the chamber where it's going to be housed with spares placed in storage rooms within the engineering department. The chamber itself is exposed to space, hardsuit and oxygen tanks are needed to be within it.
Setup
Once you have located all the components of it, you will need a wrench and some wires. The basic setup is as follows:
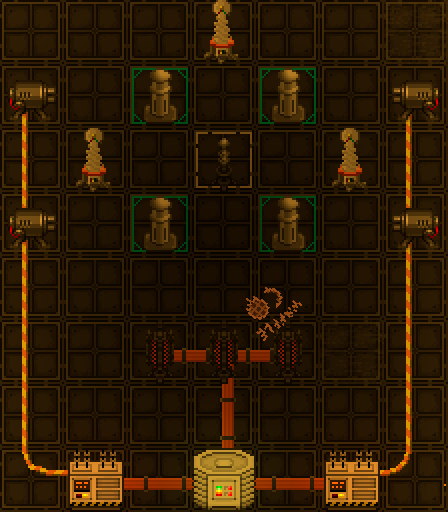
- The Tesla Generator is the central component. Place it in the middle of your setup.
- Containment Generators are placed diagonally around it. The smallest setup is a 3x3 grid. Larger fields come with more hazards.
- Emitters are placed facing the Containment Generators. Distance does not matter. They are connected with MV wires to the main network.
- Grounding rods are placed between the Emitters and Containment Generators to protect the Emitters from damage. Destruction of Emitters will leave the Containment Generators powerless which will result in the Tesla being loose.
- Tesla Coils are placed in close proximity to the Tesla Generator itself, outside the Barriers. They are connect via HV wires to the SMES and the Power Grid.
On most stations, there are HV and MV wires going into the Generator Chamber so you can easily spot where to wire each component.
PA - Particle Accelerator
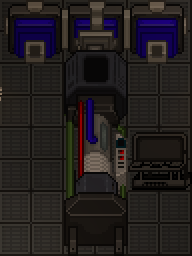
The Particle Accelerator is used to actually activate the Tesla Generator. It will always come preassembled minus the wiring, use LV wires on each component and screwdriver them close. The Control Unit (Part with the screen) may be rotated the wrong way. Simply unanchor it using a wrench and roate it. Once it is completed, interact with the Control Unit and turn it on. NOTE: Ensure that all the components of the engine are setup properly, Containment should be in place and activated, all Emitters firing and everything wired appropriately.
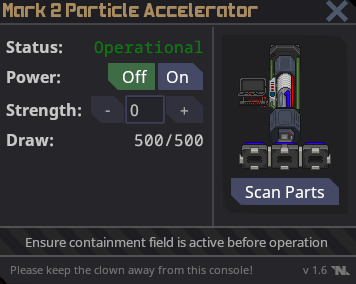
Once it is operational, turn the power on and set it's strength between 1-3. The necessary strength is circumstantial, the higher it is the faster it will activate the Tesla. Setting it to 3 will activate it in one shot but will drain more power. In most cases this will not be an issue but take note of your AME setup and how much fuel it has left.
Tesla Ball
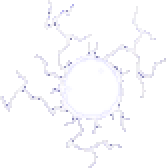
After it has been activated the Tesla Generator will turn into a large Tesla Ball or Ball Lightning. If the containment field is larger it will roam within it occasionally discharging lighting bolts at the Tesla Coils. Should the containment fail, the Ball Lightning will roam the station, being drawn towards power sources such as APCs, machinery and your PDA if the flashlight is on. It will still discharge lightning which will knock you to the ground and stun you if you do not wear insulated gloves. Keep your distance from it regardless if you wear insulated gloves or not because touching the ball itself will instantly vaporize you and turn you into ash, round removing you. The devastation the Tesla Ball can cause will most likely warrant an early shuttle call.

Disabling it using Particle Decelerators is possible but it will take more than just one shot. Unless the Chief Engineer has one in their office you will most likely need to have the Science Department research it or order one from Cargo.
More than one Particle Decelerator is necessary to effectively disable it.


